
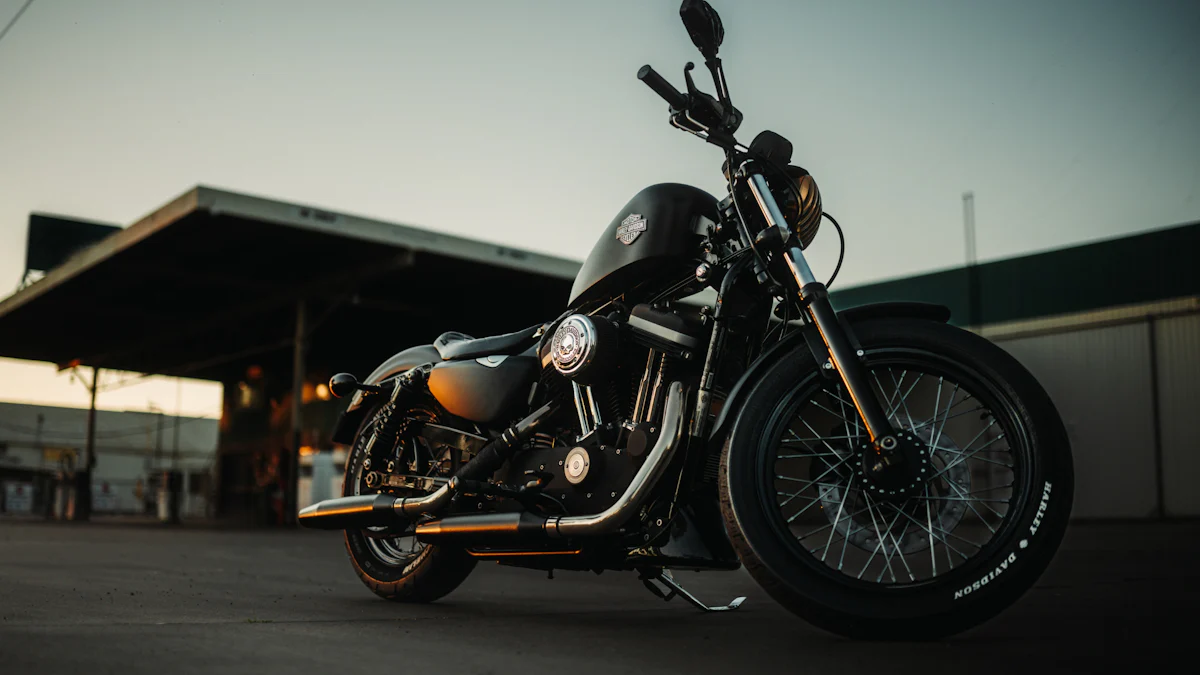
Starting your Harley Davidson motorcycle is more than just turning a key—it’s about embracing the thrill of the ride. Whether you’re preparing to start my Harley Davidson for the first time or you’re a seasoned rider, confidence begins with mastering the basics. A well-prepared start ensures your bike roars to life effortlessly. Check your battery, fuel, and key fob before you begin. These small steps prevent hiccups and keep your ride smooth. Remember, every Harley Davidson motorcycle carries a legacy of power and precision. Treat it right, and it’ll reward you with unforgettable adventures.
Key Takeaways
Always check your battery, fuel level, and key fob functionality before starting your Harley Davidson to prevent starting issues.
Perform a quick visual inspection of your motorcycle, including tires, lights, and brakes, to ensure safety and reliability on the road.
Follow the standard starting procedure: turn on the ignition, ensure the bike is in neutral, and press the start button firmly.
If your bike won’t start, troubleshoot common issues like a dead battery or key fob problems before seeking professional help.
Know alternative starting methods, such as using the manual PIN code or jump-starting, to get back on the road quickly in emergencies.
Wear proper protective gear, including a helmet and durable clothing, to enhance safety while riding your motorcycle.
Regular maintenance is key to prolonging the life of your Harley Davidson; check oil levels, tire pressure, and perform tune-ups as needed.
Preparing to Start My Harley Davidson

Check the Battery and Connections
Your Harley Davidson relies on a strong battery to power up. Before starting, inspect the battery for any signs of corrosion or loose connections. A clean and secure connection ensures a smooth flow of electricity. If you notice any buildup on the terminals, clean it gently with a wire brush. Always ensure the battery is fully charged. A drained battery can leave you stranded, so it’s wise to check it regularly.
If you ever need to jump-start your bike, use a 12V donor battery. Avoid higher voltage batteries, as they can damage your motorcycle’s electrical system. Keeping your battery in top condition not only helps with starting but also prolongs its lifespan.
Inspect the Fuel Level and System
Fuel is the lifeblood of your Harley Davidson. Before hitting the start button, check the fuel level in the tank. Running out of gas mid-ride can be frustrating and unsafe. If your bike has been sitting idle for a while, inspect the fuel system for any leaks or blockages. Old or contaminated fuel can cause starting issues, so always use fresh, high-quality gasoline.
Take a moment to ensure the fuel valve is in the correct position. For carbureted models, set the choke properly when starting a cold engine. These small checks can save you from unnecessary delays and keep your ride enjoyable.
Verify the Key Fob Functionality
Modern Harley Davidson motorcycles come equipped with a key fob that adds convenience and security. This small device communicates with your bike’s security system, allowing you to start it effortlessly. Before starting, confirm that your key fob is working correctly. If it’s not responding, the battery might need replacement. Use a 2032 coin-style battery to replace it, and follow the reset procedure to reprogram the fob.
Tip: To reset your key fob, turn the ignition switch on and off twice, then press the left turn signal twice. This process ensures your fob syncs with the bike.
Always carry a spare key fob or know your manual PIN code as a backup. This precaution ensures you’re never stuck if the fob malfunctions. A functional key fob guarantees a hassle-free start and keeps your Harley Davidson secure.
Perform a Quick Visual Inspection
Before you fire up your Harley Davidson, take a moment to give it a thorough visual check. This simple step can save you from unexpected issues on the road. Walk around your bike and look for anything unusual or out of place.
Start by inspecting the tires. Check for proper inflation and look for any visible damage, like cracks or embedded objects. Properly inflated tires ensure better handling and safety during your ride. Next, examine the brake lines and cables. Make sure there are no leaks or frayed wires that could compromise your braking system.
Take a close look at the lights and indicators. Test the headlights, brake lights, and turn signals to confirm they’re functioning correctly. Visibility is crucial, especially when riding at night or in low-light conditions. If any bulbs are out, replace them immediately.
Don’t forget to check the mirrors. Adjust them to ensure you have a clear view of the road behind you. Misaligned mirrors can make it harder to spot vehicles or obstacles, which could lead to accidents.
Lastly, inspect the chain or belt drive. Look for signs of wear or slackness. A well-maintained drive system ensures smooth power delivery to the wheels. If you notice any issues, address them before starting your motorcycle.
Pro Tip: Keep a small toolkit handy for quick fixes. It’s always better to be prepared for minor adjustments on the go.
By performing this quick visual inspection, you’ll not only enhance your safety but also prolong the life of your Harley Davidson. It’s a small effort that goes a long way in ensuring a hassle-free and enjoyable ride.
Step-by-Step Guide to Start My Harley Davidson Motorcycle
Standard Starting Procedure
Starting your Harley Davidson motorcycle begins with a few essential steps. First, locate the ignition switch and turn it to the “ON” position. This action powers up the electrical system and prepares the bike for starting. Ensure the motorcycle is in neutral by checking the gear indicator or gently rocking the bike to confirm it’s not in gear. If your bike has a clutch, pull it in to disengage the transmission.
Next, flip the kill switch to the “RUN” position. This step activates the fuel pump and ignition system. Press the start button firmly and hold it until the engine roars to life. Avoid holding the button for too long if the engine doesn’t start immediately. Instead, release it and try again after a few seconds.
Pro Tip: Always let the engine idle for a minute or two before riding. This practice allows the oil to circulate and ensures smooth performance.
Following these simple instructions ensures a reliable start every time. With practice, you’ll master this procedure and feel confident every time you start your Harley Davidson motorcycle.
Using the Keyless Start System
Many modern Harley Davidson motorcycles feature a keyless start system, adding convenience and security to your ride. To use this system, keep the key fob within range of the bike. The fob communicates with the motorcycle’s security system, allowing you to start it without inserting a key.
Begin by turning the ignition switch to the “ON” position. If your bike requires a manual PIN code, enter it using the turn signal buttons. Press the left turn signal twice, followed by the right turn signal once, to input the code. Once the system recognizes the fob or PIN, flip the kill switch to “RUN” and press the start button.
Note: If the key fob battery is dead, replace it with a 2032 coin-style battery. Always carry a spare fob or know your PIN code to avoid being stranded.
The keyless start system simplifies the process and enhances security. By following these instructions, you can start your Harley Davidson motorcycle effortlessly.
Starting a Cold Harley Davidson
Starting a cold Harley Davidson motorcycle requires a slightly different approach. Begin by opening the choke if your bike has a carburetor. This step enriches the fuel mixture, making it easier for the engine to start. Turn the ignition switch to “ON” and ensure the kill switch is set to “RUN.”
Pull in the clutch and press the start button. Once the engine starts, let it idle for a few minutes. This warm-up period allows the engine oil to circulate and ensures optimal performance. Gradually close the choke as the engine warms up to prevent stalling.
Quick Tip: Avoid revving the engine immediately after starting. Letting it idle protects the engine and prolongs its lifespan.
Starting a cold Harley Davidson motorcycle may take a bit more time, but it’s worth the effort. With these steps, you’ll ensure a smooth and reliable start, even on chilly mornings.
Troubleshooting Issues When My Harley Davidson Won’t Start
Even the most reliable motorcycles can face starting issues. When your Harley Davidson refuses to start, it’s essential to stay calm and methodically address the problem. Let’s dive into some common issues and how you can resolve them.
Dead Battery Solutions
A drained battery is one of the most frequent reasons your Harley Davidson won’t start. To tackle this, begin by checking the battery’s charge level. Use a multimeter to measure the voltage. If it reads below 12.6 volts, the battery needs charging. Connect it to a compatible motorcycle battery charger and let it charge fully.
If charging doesn’t work, inspect the battery terminals. Corrosion or loose connections can disrupt the power flow. Clean the terminals with a wire brush and ensure they’re tightly secured. If the battery still doesn’t hold a charge, it might be time for a replacement.
In emergencies, jump-starting can get you back on the road. Use a 12V donor battery and high-quality jumper cables. Connect the positive terminal of the donor battery to the positive terminal of your Harley’s battery. Then, connect the negative terminal of the donor battery to a metal part of your bike’s frame. Start the donor vehicle first, then attempt to start your Harley. Disconnect the cables in reverse order once the engine starts.
Expert Tip: According to Harley Davidson mechanics, jump-starting is safe if done correctly. Always ensure secure connections and follow the steps carefully to avoid damaging your bike’s electrical system.
To prevent future issues, maintain your battery regularly. Check its charge level, clean the terminals, and avoid leaving electrical components on when the engine isn’t running.
Resolving Key Fob Problems
Modern Harley Davidson motorcycles rely on key fobs for starting and security. If your bike doesn’t start, the key fob could be the culprit. First, check if the fob is within range of the motorcycle. If it’s too far, the bike won’t recognize it.
If the fob still doesn’t work, the battery might be dead. Replace it with a 2032 coin-style battery. After replacing the battery, reset the fob to sync it with your bike. Here’s how:
Set the kill switch to “off.”
Cycle the ignition switch on and off twice, then turn it on again.
Press the left turn signal twice.
Use the fob button to display the current PIN on the odometer.
Adjust each digit using the left turn signal and confirm with the fob button.
Pro Insight: Harley-Davidson Smart Security System experts recommend always carrying a spare key fob or knowing your manual PIN code. This ensures you’re never stranded due to a malfunctioning fob.
If the issue persists, visit a Harley-Davidson dealer. They can reprogram or replace the fob to restore functionality.
Addressing Engine Start Failures
When the engine doesn’t start, the problem might lie in the fuel system, ignition, or other mechanical components. Start by checking the fuel level. Ensure there’s enough gas in the tank and that the fuel valve is in the correct position. For carbureted models, set the choke properly.
Next, inspect the kill switch. It should be in the “RUN” position. If the fuel pump doesn’t engage when you turn the ignition on, there might be an issue with the pump or electrical system.
If the engine cranks but doesn’t start, the spark plugs could be the problem. Remove and inspect them for wear or fouling. Clean or replace them as needed. Also, check the ignition coil and wires for damage.
Quick Fix: Sometimes, simply letting the bike sit for a few minutes and trying again can resolve minor issues. This gives the system time to reset.
For persistent problems, consult a professional mechanic. They can diagnose and fix complex issues, ensuring your Harley Davidson runs smoothly.
Alternative Methods to Start My Harley Davidson Motorcycle
Sometimes, your Harley Davidson might not start using the standard methods. Whether it’s due to a drained battery or a malfunctioning key fob, knowing alternative ways to get your bike running can save the day. Let’s explore three reliable methods.
Using the Manual PIN Code
If your key fob fails or its battery dies, you can use the manual PIN code to start your Harley Davidson. This feature acts as a backup for the keyless ignition system. Here’s how you can do it:
Turn the ignition switch to the “ON” position.
Press the left turn signal button twice, followed by the right turn signal button once. This action will display the PIN entry screen on the odometer.
Use the left turn signal button to scroll through the digits and the right turn signal button to confirm each digit.
Once you’ve entered the correct PIN, the security system will disengage. Flip the kill switch to “RUN” and press the start button.
Pro Tip: If you don’t know your PIN, contact your Harley Davidson dealer to retrieve or reset it. Always keep your PIN handy to avoid being stranded.
Using the manual PIN code ensures you can start your motorcycle even when the key fob isn’t working. It’s a simple yet effective solution that every Harley rider should know.
Jump-Starting the Motorcycle
A drained battery can leave you stuck, but jump-starting a motorcycle can quickly get you back on the road. While Harley Davidson doesn’t recommend this method as a first choice, it’s safe if done correctly. Follow these steps:
Use a 12V donor battery, such as another motorcycle or a portable jump starter. Avoid using a car battery, as it can deliver too much power and damage your bike’s electrical system.
Connect the positive terminal of the donor battery to the positive terminal of your Harley’s battery using high-quality jumper cables.
Attach the negative terminal of the donor battery to a metal part of your bike’s frame, away from the battery and fuel system.
Start the donor vehicle first, then attempt to start your Harley Davidson. Once the engine starts, disconnect the cables in reverse order.
Important: Ensure all connections are secure and follow the steps carefully. Improper jump-starting can harm your motorcycle’s electrical components.
Carrying a portable jump starter is a smart move. It eliminates the need for another vehicle and makes jump-starting a motorcycle more convenient. Regularly check your battery’s health to reduce the chances of needing this method.
Push Starting a Harley Davidson
Push starting, also known as bump starting, is another way to revive your Harley Davidson when the battery is too weak to crank the engine. This method works best on manual transmission bikes. Here’s how you can do it:
Put your bike in second gear. First gear can cause a hard lurch when the engine fires.
Pull in the clutch and start pushing the bike. If you’re on a slight incline, let gravity assist you.
Once you’ve gained enough momentum, release the clutch quickly while pressing the start button. The engine should fire up.
Quick Note: Push starting requires physical effort and may not work if the battery is completely dead. It’s a good idea to practice this method in a safe environment before you need it.
Push starting is a handy skill for emergencies, especially when you’re far from help. However, it’s not a long-term solution. Address the underlying issue, like a drained battery, as soon as possible.
By mastering these alternative methods, you’ll be prepared for unexpected situations. Whether it’s using the manual PIN code, jump-starting a motorcycle, or push starting, these techniques ensure you’re never left stranded.
Safety Tips and Best Practices for Starting a Harley Davidson Motorcycle
Starting your Harley Davidson motorcycle isn’t just about getting the engine running—it’s about ensuring your safety and keeping your bike in top condition. By following these tips, you’ll not only protect yourself but also enjoy a smoother and more reliable ride.
Wear Proper Protective Gear
Safety starts with what you wear. Before you even think about starting your motorcycle, make sure you’re dressed for the ride. A sturdy helmet is non-negotiable. It protects your head and can save your life in case of an accident. Look for helmets that meet DOT or Snell safety standards for maximum protection.
Don’t stop at the helmet. Wear a durable jacket, gloves, and boots. A leather or armored jacket shields your upper body from road rash and debris. Gloves improve your grip on the handlebars and protect your hands from the elements. Boots with non-slip soles provide stability when you’re stopping or starting your bike.
Quick Tip: Invest in riding pants or jeans with reinforced panels. They offer extra protection for your legs without compromising comfort.
Proper gear doesn’t just keep you safe—it boosts your confidence. When you’re fully equipped, you can focus on the road ahead without distractions.
Perform Regular Maintenance
Your Harley Davidson deserves regular care to perform at its best. Maintenance isn’t just about keeping your bike looking good; it ensures everything works as it should. Start by checking the basics like tire pressure, oil levels, and brake fluid. Properly inflated tires improve handling and reduce the risk of blowouts. Clean oil keeps the engine running smoothly, while fresh brake fluid ensures responsive braking.
Inspect your battery regularly. A weak or drained battery can leave you stranded. Use a portable jump-starter kit to charge it without removing the seat. This tool is a lifesaver when you’re on the go. Also, clean the battery terminals to prevent corrosion and ensure a strong connection.
Don’t forget the chain or belt drive. A well-lubricated and tensioned drive system delivers power efficiently to the wheels. Check for wear and adjust it as needed.
Pro Tip: Schedule a professional tune-up at least once a year. A trained mechanic can spot issues you might miss and keep your Harley running like new.
Regular maintenance not only extends your bike’s lifespan but also gives you peace of mind every time you start it.
Follow Manufacturer Guidelines
Harley Davidson provides detailed guidelines for operating and maintaining your motorcycle. These instructions aren’t just suggestions—they’re essential for keeping your bike in peak condition. Always refer to your owner’s manual for specific recommendations.
Start by using the right type of fuel and oil. Harley Davidson motorcycles are designed to run on high-quality gasoline and specific oil grades. Using the wrong products can harm the engine and reduce performance. Stick to the recommended service intervals for oil changes, filter replacements, and other routine tasks.
When learning how to ride a motorcycle, pay attention to the manufacturer’s advice on starting procedures. For example, some models require you to use the choke when starting a cold engine. Others might have unique steps for keyless ignition systems. Following these instructions ensures a smooth start every time.
Important: Avoid aftermarket modifications that aren’t approved by Harley Davidson. They can void your warranty and affect your bike’s performance.
By adhering to the manufacturer’s guidelines, you’ll not only protect your investment but also enjoy a safer and more enjoyable riding experience.
Starting your Harley Davidson motorcycle becomes second nature when you follow the right steps. Preparation is key—check your battery, fuel, and key fob before every ride. If issues arise, troubleshoot calmly and rely on alternative methods like using the manual PIN code or jump-starting. Always prioritize safety by wearing proper gear and maintaining your bike regularly. These practices not only protect you but also ensure your Harley Davidson motorcycle performs at its best. With these tips, you’ll confidently start your Harley Davidson like a pro and enjoy every ride to the fullest.
FAQ
How often should I check my Harley Davidson battery?
You should check your Harley Davidson battery at least once a month. Regular checks help you spot issues like corrosion or low charge before they become bigger problems. A well-maintained battery ensures your bike starts reliably every time. If you ride frequently, consider investing in a battery tender to keep it charged when not in use.
Can I jump-start my Harley Davidson motorcycle?
Yes, you can jump-start your Harley Davidson motorcycle, but it’s not the first choice. Harley Davidson doesn’t recommend jump-starting as it can strain the electrical system. If necessary, use another motorcycle with a 12V battery. Avoid using a car battery to prevent damage. Always follow the correct steps and ensure secure connections to avoid mishaps.
What should I do if my key fob stops working?
If your key fob stops working, first check its battery. Replace it with a 2032 coin-style battery if needed. After replacing the battery, reprogram the fob by cycling the ignition switch and using the turn signal buttons. Always carry a spare key fob or know your manual PIN code to avoid being stranded.
Why won’t my Harley Davidson start in cold weather?
Cold weather can make starting your Harley Davidson more challenging. The battery may lose charge faster in low temperatures, and the engine oil thickens, making it harder to crank. Use the choke for carbureted models and let the engine idle for a few minutes to warm up. Keeping your bike in a garage or using a battery tender can also help during colder months.
How do I maintain my Harley Davidson flag mounts?
Maintaining your Harley Davidson flag mounts is simple and ensures they stay secure and stylish. Regularly check the mounts for any signs of wear or looseness. Clean them with a soft cloth to remove dirt and debris. High-quality flag mounts, like the ones available at Masion Motor, are durable and designed to withstand the elements, making them a great addition to your bike.
What’s the best way to store my Harley Davidson during the off-season?
The best way to store your Harley Davidson during the off-season is to prepare it properly. Clean the bike thoroughly to remove dirt and moisture. Use a fuel stabilizer to prevent the gas from going bad. Disconnect the battery or use a battery tender to keep it charged. Cover your bike with a breathable motorcycle cover to protect it from dust and moisture.
How do I troubleshoot a Harley Davidson that cranks but won’t start?
If your Harley Davidson cranks but won’t start, check the fuel system first. Ensure there’s enough gas and the fuel valve is in the correct position. Inspect the spark plugs for wear or fouling and replace them if necessary. Also, verify that the kill switch is set to “RUN” and listen for the fuel pump engaging when you turn on the ignition.
Are Harley Davidson flag mounts worth it?
Absolutely! Harley Davidson flag mounts let you personalize your bike while showing off your style or patriotism. They’re easy to install and built to last. Whether you’re riding in a parade or just cruising, flag mounts add a unique touch to your motorcycle. Check out Masion Motor for high-quality options that fit perfectly on your Harley.
What should I do if my Harley Davidson stalls after starting?
If your Harley Davidson stalls after starting, it could be due to a fuel or air issue. Check the fuel level and ensure the choke is set correctly for carbureted models. Inspect the air filter for clogs or dirt. Let the engine idle for a few minutes to warm up before riding, especially in colder weather.
How can I extend the life of my Harley Davidson motorcycle?
To extend the life of your Harley Davidson, perform regular maintenance. Check the oil, tire pressure, and brake fluid frequently. Clean and lubricate the chain or belt drive. Follow the manufacturer’s guidelines for service intervals. Riding responsibly and storing your bike properly during the off-season also helps keep it in top condition for years to come.