Changing the oil in your Harley-Davidson isn’t just routine maintenance—it’s a way to keep your bike running smoothly and performing at its best. Fresh oil ensures that your Harley-Davidson V-Twin engine stays lubricated, reducing wear and tear on critical components. Regular oil changes also help extend the life of your motorcycle, saving you from costly repairs down the road. Whether you’re a seasoned rider or new to DIY maintenance, learning how to change Harley Davidson engine oil at home gives you control over your bike’s care and performance.
Key Takeaways
Regular oil changes are essential for maintaining your Harley-Davidson’s performance and extending its lifespan.
Gather all necessary tools and materials, including an oil filter wrench, socket wrench set, drain pan, and Harley-Davidson-approved engine oil, to ensure a smooth oil change process.
Warm up your engine before starting the oil change to help the oil drain more efficiently and completely.
Follow a step-by-step process: drain the old oil, replace the oil filter, and add new oil, ensuring you check the oil level afterward.
Perform post-oil change checks to verify oil levels and inspect for leaks, ensuring your bike is ready for the road.
Dispose of old oil and filters responsibly to protect the environment and maintain safety in your workspace.
Consider investing in a Harley-Davidson Oil Change Kit for convenience, as it includes all necessary components for the oil change.
Tools and Materials Needed for a Harley-Davidson Oil Change
Before you dive into changing your Harley-Davidson’s oil, it’s crucial to gather the right tools and materials. Having everything ready ensures a smooth process without interruptions. Let’s break down what you’ll need.
Essential Tools
To get started, you’ll need a few basic tools that make the job easier and more efficient:
Oil filter wrench: This tool helps you remove the old oil filter without damaging it. It’s a must-have for a hassle-free filter replacement.
Socket wrench set: You’ll use this to loosen and tighten the oil drain plug. Make sure the set includes the correct size for your Harley model.
Drain pan: A drain pan catches the used oil as it flows out of the engine. Choose one with a large enough capacity to avoid spills.
Funnel: A funnel ensures you pour the new oil into the engine cleanly, without making a mess.
Materials
Using the right materials is just as important as having the right tools. Here’s what you’ll need:
Harley-Davidson-approved engine oil: Always use oil that meets the manufacturer’s specifications. This ensures optimal performance and protects your engine from wear and deposits.
New oil filter: Replace the old filter with a fresh one to keep contaminants out of your engine. Many oil change kits include a compatible filter.
Gloves and rags for cleanup: Oil changes can get messy. Gloves protect your hands, while rags help you clean up spills and wipe down surfaces.
Optional Items
While not mandatory, these items can make the process even smoother:
Torque wrench: This tool ensures you tighten the drain plug and oil filter to the manufacturer’s recommended torque settings. It’s especially useful if you’re new to DIY maintenance.
Motorcycle lift or stand: A lift or stand raises your bike off the ground, giving you better access to the drain plug and oil filter. It’s a great investment if you plan to do regular maintenance at home.
Pro Tip: Consider purchasing a Harley-Davidson Oil Change Kit. These kits often include everything you need, from motor oil to filters and O-rings, saving you time and effort.
Having the right tools and materials on hand not only simplifies the oil change process but also ensures you do the job correctly. With these essentials, you’re well on your way to keeping your Harley in top condition.
Preparation Steps Before You Change Oil in a Harley-Davidson
Taking the time to prepare properly before changing your Harley-Davidson’s oil can save you from unnecessary hassle. Follow these steps to ensure everything goes smoothly.
Warm Up the Engine
Before you start, warm up your motorcycle’s engine. Turn it on and let it idle for about 5–10 minutes. This step helps the oil reach its normal operating temperature, making it thinner and easier to drain. If you want, take your bike for a short ride around the block. Warm oil flows out more efficiently, ensuring you remove as much of the old oil as possible.
Quick Tip: Avoid letting the engine run too long. Overheating can make the oil dangerously hot and harder to handle.
Position the Motorcycle
Find a flat, stable surface to work on. This ensures your bike stays secure during the oil change. If you have a motorcycle stand or lift, use it to raise the bike slightly. This gives you better access to the drain plug and oil filter. A stable setup not only makes the process easier but also keeps you safe while working.
Pro Tip: If you don’t have a stand, double-check that your kickstand is firmly planted and the bike is balanced.
Gather Tools and Materials
Before you begin, gather all the tools and materials you’ll need. Having everything within arm’s reach prevents interruptions and keeps the process efficient. Lay out your oil filter wrench, socket wrench, drain pan, funnel, gloves, and rags. Don’t forget the new oil filter and Harley-Davidson-approved engine oil.
Why It Matters: Being prepared saves time and reduces the risk of spills or mistakes during the oil change.
By following these preparation steps, you set yourself up for a smooth and hassle-free oil change. Taking a few extra minutes to get ready ensures you’ll complete the job efficiently and without unnecessary stress.
Step-by-Step Process: How to Change Motorcycle Oil
Changing the oil in your Harley-Davidson at home is a straightforward process when you follow the right steps. Let’s dive into the detailed instructions to ensure you get it done efficiently and correctly.
Drain the Old Oil
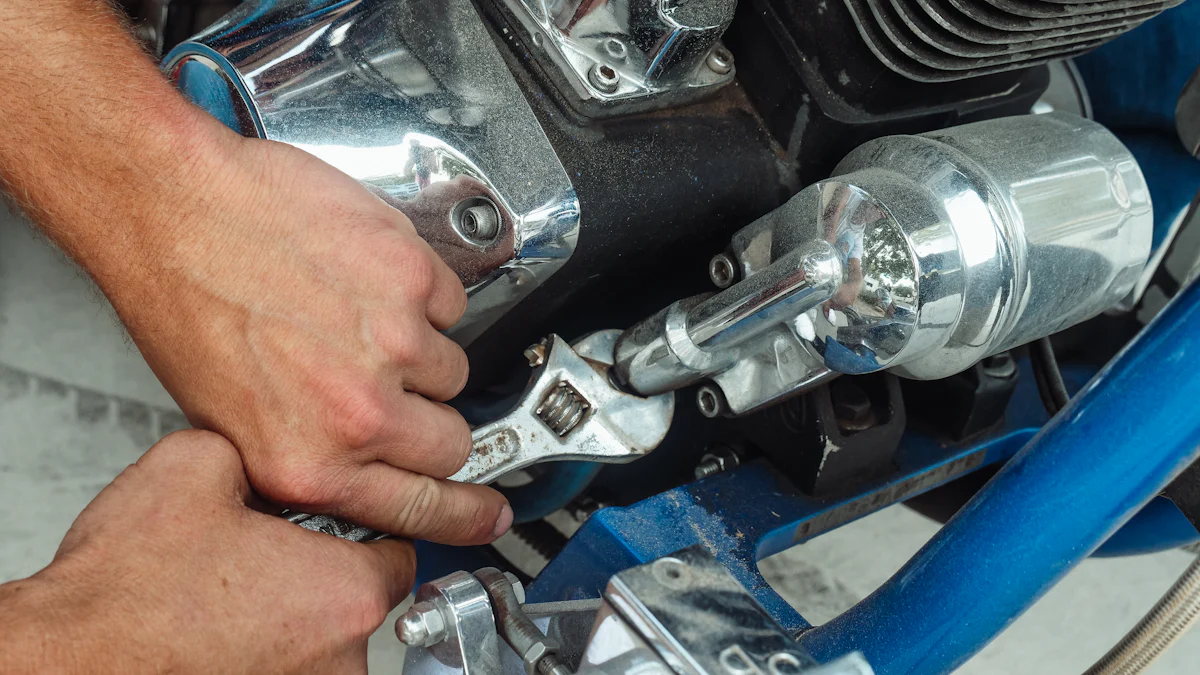
Locate the oil drain plug
Start by identifying the oil drain plug on your Harley-Davidson. On most models, you’ll find it beneath the engine or near the frame. Refer to your owner’s manual if you’re unsure of its exact location. Once located, place a drain pan directly underneath to catch the old oil.Remove the drain plug
Use a socket wrench to loosen and remove the drain plug. Allow the engine oil to flow out completely into the pan. This step might take a few minutes, so be patient to ensure all the old oil drains out.
Pro Tip: Tilt the bike slightly if needed to get every last drop of oil out. This ensures a cleaner and more effective oil change.
Inspect the drain plug
Before reinstalling, check the drain plug for any damage or worn threads. Replace it if necessary to avoid leaks later.
Replace the Oil Filter
Remove the old filter
Use an oil filter wrench to unscrew the old filter. Be prepared for some oil to spill out during this step, so keep your rags handy. Dispose of the old filter responsibly.Prepare the new filter
Take your new oil filter and apply a thin layer of fresh motor oil to the rubber gasket. This helps create a proper seal and makes it easier to remove during the next oil change.Install the new filter
Screw the new filter into place by hand. Tighten it securely, but avoid over-tightening. A snug fit is enough to prevent leaks.
Quick Tip: Always use a high-quality filter that meets Harley-Davidson’s specifications. This ensures your engine stays protected from contaminants.
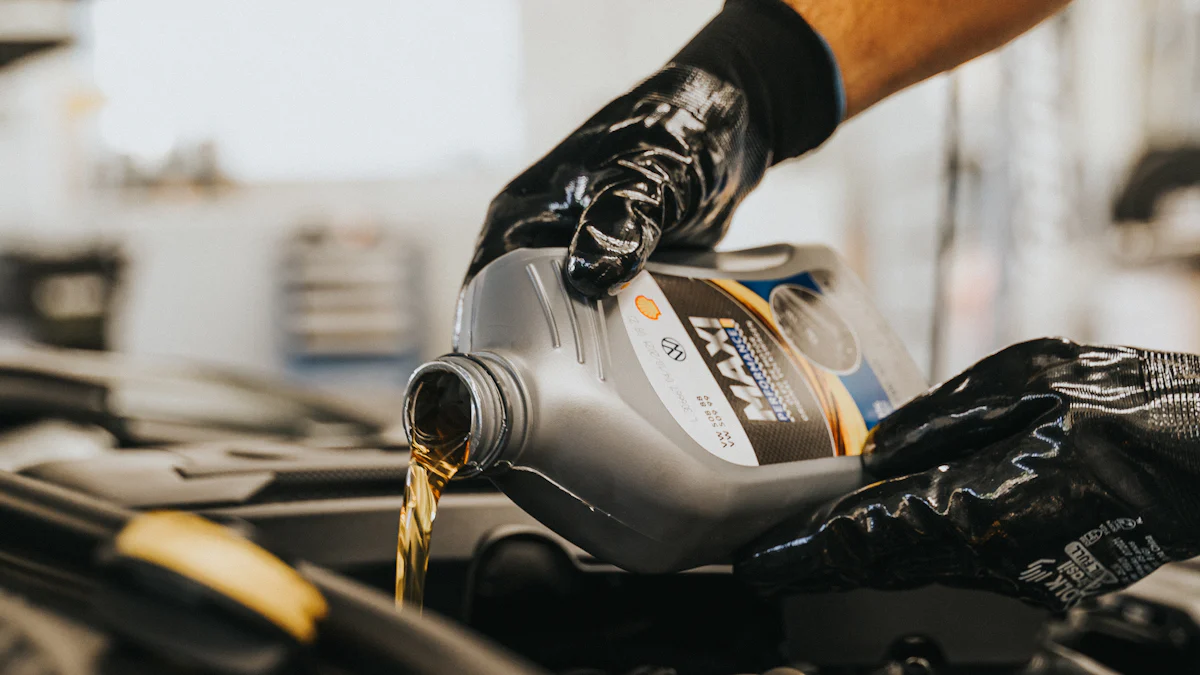
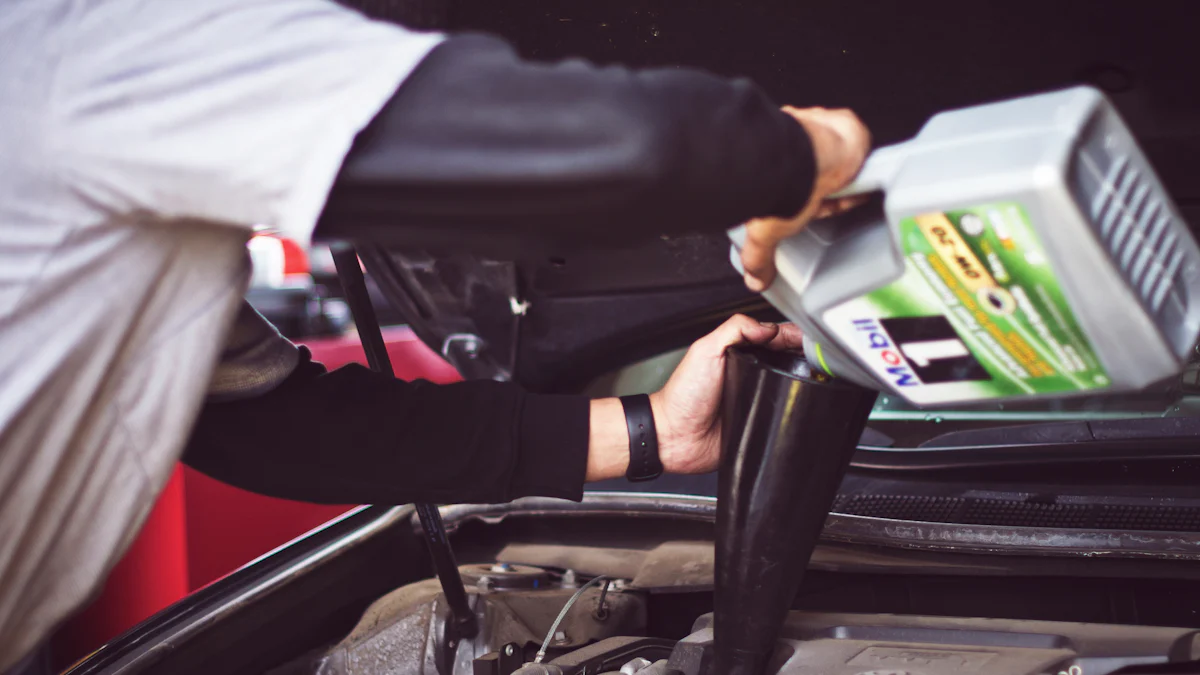
Add New Oil
Reinstall the drain plug
Once the old oil has fully drained, reinstall the drain plug. Use a torque wrench to tighten it to the manufacturer’s recommended settings. This prevents under-tightening or over-tightening, which could lead to leaks or damage.Pour in the new oil
Place a funnel into the oil fill port and slowly pour in the new engine oil. Check your owner’s manual for the correct type and quantity of oil required for your Harley-Davidson model. Overfilling can cause issues, so pour gradually and monitor the level.Check the oil level
After adding the oil, use the dipstick to check the level. If it’s below the recommended mark, add a little more until it reaches the correct level.
Important: Always use Harley-Davidson-approved motor oil for optimal performance and longevity. Using the wrong oil can harm your engine.
By following these oil change instructions, you’ll keep your Harley-Davidson running smoothly and efficiently. Learning how to change motorcycle oil not only saves you money but also gives you a deeper understanding of your bike’s maintenance needs. With practice, this process will become second nature, making you more confident in caring for your motorcycle.
Post-Oil Change Checks for a Harley-Davidson Oil Change
Once you’ve completed the oil change, it’s important to perform a few final checks to ensure everything is in perfect order. These steps will help you confirm that your Harley-Davidson is ready to hit the road without any issues.
Verify Oil Levels
Start the engine
Turn on your motorcycle and let it idle for about a minute. This allows the new engine oil to circulate through the system. Once done, turn off the engine and give it a moment to settle.Check the oil level
Use the dipstick to measure the oil level. Insert it into the oil fill port, then pull it out to see if the oil is between the minimum and maximum marks. If the level is too low, add more oil gradually and recheck until it’s just right.
Pro Tip: Always double-check the oil level after warming up the engine. This ensures accuracy and prevents overfilling, which can cause performance issues.
Inspect for Leaks
Examine the drain plug
Look closely at the area around the drain plug. Ensure there’s no oil seeping out. A properly tightened plug should prevent any leaks.Check the oil filter
Inspect the base of the oil filter for any signs of dripping oil. If you notice a leak, tighten the filter slightly by hand. Avoid over-tightening, as this can damage the gasket.
Why It Matters: Catching leaks early prevents oil loss and protects your engine from potential damage caused by insufficient lubrication.
Clean Up
Dispose of old oil and filter
Take the used engine oil and old filter to a local recycling center. Many auto parts stores and service stations accept these items for proper disposal. Never pour oil down the drain or throw it in the trash—it’s harmful to the environment.Tidy up your workspace
Wipe down any spills on your bike or the floor using rags. Store your tools in their designated places so they’re ready for your next maintenance task.
Quick Reminder: Keeping your workspace clean not only makes future tasks easier but also ensures safety by reducing the risk of slipping on spilled oil.
By completing these post-oil change checks, you’ll have peace of mind knowing your Harley-Davidson is in top condition. These simple steps ensure your engine oil is at the correct level, your bike is leak-free, and your workspace stays organized. Now, you’re ready to enjoy a smooth and worry-free ride.
Changing Harley-Davidson engine oil at home is a rewarding task that saves you money and deepens your connection with your bike. By following the steps outlined in this guide, you ensure your Harley-Davidson V-Twin engine stays in peak condition, delivering smooth rides and reliable performance. Regular oil changes are essential for extending your motorcycle’s lifespan and avoiding costly repairs. Always refer to your owner’s manual for specific recommendations, and if you ever wonder, “How often should I change the oil?”, remember that consistent maintenance is key. Take pride in caring for your Harley—it’s worth it.
FAQ
How often should you change the oil in your Harley-Davidson?
You should change your Harley-Davidson’s oil at regular intervals to keep the engine running smoothly. The exact timing depends on your model and riding conditions. Always check your owner’s manual for the recommended oil change schedule. Typically, synthetic oil changes are suggested every 5,000 to 7,500 miles.
How do you check the oil level on a Harley-Davidson?
Checking your Harley-Davidson’s oil is simple. First, park your bike on level ground and let it rest on the jiffy stand. Locate the dipstick, usually found on the oil tank. Remove it, wipe it clean, and reinsert it without screwing it in. Pull it out again to see if the oil level falls between the minimum and maximum marks. If it’s low, add oil gradually and recheck.
Can you use any motor oil for your Harley-Davidson?
No, you should always use Harley-Davidson-approved motor oil or oil that meets the manufacturer’s specifications. Using the wrong oil can harm your engine and reduce performance. Check your owner’s manual for the correct type and viscosity of oil for your specific model.
What happens if you overfill the oil in your Harley-Davidson?
Overfilling the oil can cause excessive pressure in the engine, leading to leaks or damage to seals. It may also result in poor engine performance. Always add oil gradually and use the dipstick to ensure the level stays within the recommended range.
Do you need a torque wrench for an oil change?
While not mandatory, a torque wrench is highly recommended. It ensures you tighten the drain plug and oil filter to the manufacturer’s specified torque settings. This prevents under-tightening, which can cause leaks, or over-tightening, which can damage threads or gaskets.
Where is the oil drain plug located on most Harley-Davidson models?
The oil drain plug is typically located beneath the engine or near the frame. On Softail models, you’ll find it under the seat, slightly behind the frame. Always refer to your owner’s manual for the exact location to avoid confusion.
What are the benefits of using Harley-Davidson flag mounts?
Adding Harley-Davidson flag mounts to your bike enhances its style and lets you showcase your personality. These mounts are durable and designed to fit securely on your motorcycle. Whether you’re riding in a parade or showing off your pride, flag mounts make your Harley stand out. Explore our collection of Harley-Davidson flag mounts for high-quality options.
Can you reuse an old oil filter during an oil change?
No, you should always replace the oil filter during an oil change. Old filters can contain contaminants that may harm your engine. A new filter ensures clean oil flows through your engine, improving performance and longevity.
Is it necessary to warm up the engine before changing the oil?
Yes, warming up the engine is essential. Let your bike idle for 5–10 minutes before starting the oil change. Warm oil flows more easily, allowing you to drain out as much of the old oil as possible. Avoid overheating the engine, as hot oil can be dangerous to handle.
How do you dispose of old oil and filters responsibly?
Take your used oil and filters to a local recycling center or an auto parts store that accepts them. Never pour oil down the drain or throw it in the trash. Proper disposal protects the environment and keeps your community safe.