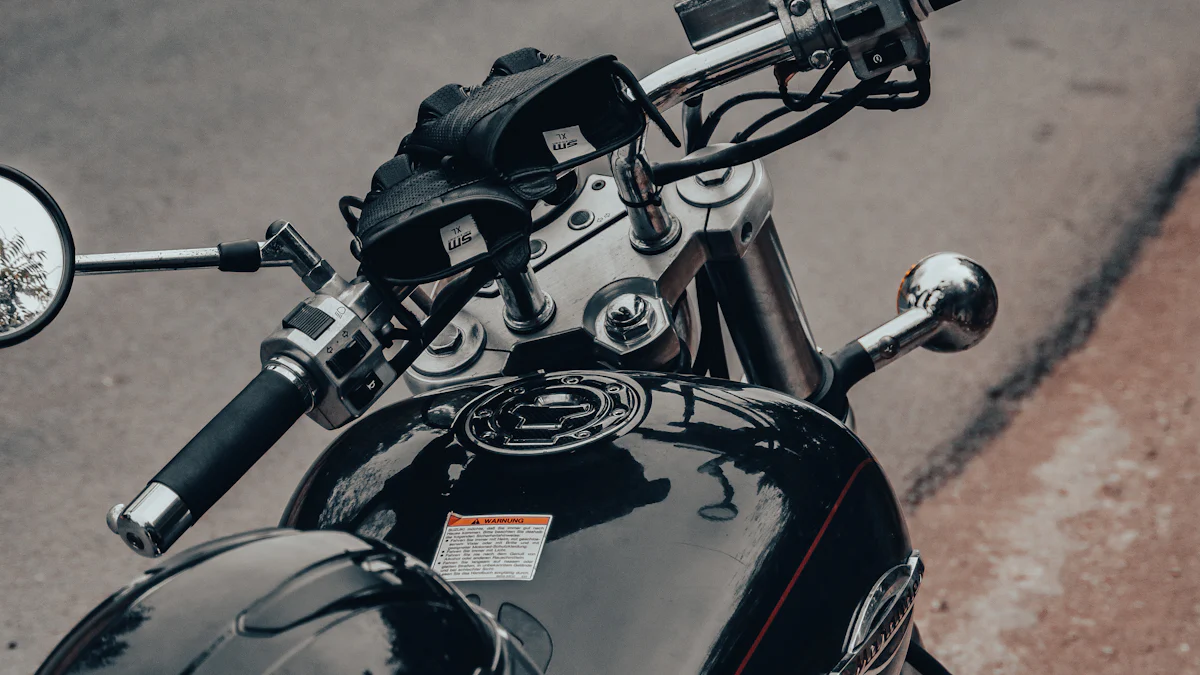
Customizing your Harley-Davidson motorcycle is more than just a style statement—it’s about creating a ride that feels uniquely yours. Swapping out the stock handlebars for custom ones can transform your bike’s comfort, control, and overall look. Whether you’re aiming for a sleek, modern vibe or a classic Harley-Davidson touring aesthetic, custom handlebars let you tailor your ride to match your personality. Plus, installing them isn’t as daunting as it might seem. With the right tools and guidance, you can install custom handlebars and enjoy a more personalized riding experience.
Key Takeaways
Custom handlebars can enhance your Harley-Davidson’s comfort, control, and style, allowing for a personalized riding experience.
Gather essential tools like wrenches, screwdrivers, and a torque wrench before starting the installation to ensure a smooth process.
Safety first: Always disconnect the battery and stabilize your motorcycle before beginning the installation.
Take your time to properly remove old handlebars and label components to simplify reassembly.
Ensure new handlebars are aligned and secured correctly, using a torque wrench to avoid over-tightening.
Regularly check the tightness of handlebars and inspect cables for wear to maintain safety and performance.
Test all controls and electrical components thoroughly after installation to ensure everything functions properly before hitting the road.
Tools and Materials Needed
Before diving into the installation process, gathering the right tools and materials is essential. Having everything ready will save you time and make the process smoother. Let’s break down what you’ll need.
Essential Tools for Installing Motorcycle Handlebars
To install your new handlebars, you’ll rely on a few basic tools. These are likely already in your toolbox, but double-check to ensure you’re fully prepared.
Wrenches and socket set: These will help you loosen and tighten bolts securely. Make sure you have the correct sizes for your Harley-Davidson.
Screwdrivers (Phillips and flathead): You’ll need these to remove and reattach various components like control switches and grips.
Torque wrench: This tool ensures you tighten bolts to the manufacturer’s specifications, preventing over-tightening or under-tightening.
Allen keys: These are crucial for loosening and securing screws on your handlebars and other parts.
Having these tools on hand will make the installation process straightforward and efficient.
Additional Materials for Harley Davidson Sportster Handlebars
In addition to tools, you’ll need a few materials to complete the job. These items ensure a proper fit and smooth operation of your new handlebars.
New custom handlebars: Choose handlebars that match your style and riding needs. Consider factors like height, width, and compatibility with your Harley-Davidson.
Electrical tape: Use this to secure wires and prevent them from fraying during installation.
Cable extensions (if required): Depending on the size and style of your new handlebars, you may need longer cables for the throttle, clutch, or brakes.
Lubricant or anti-seize compound: Apply this to bolts and screws to prevent rust and make future adjustments easier.
Pro Tip: When purchasing handlebars, think about your riding style and comfort. Some handlebars, like ape hangers or drag bars, offer unique aesthetics but may require additional adjustments. Getting the perfect handlebars the first time around saves you time and effort.
With these tools and materials ready, you’re all set to start customizing your Harley-Davidson. Preparation is key, so take a moment to organize everything before moving on to the next step.
Preparation Steps
Before you dive into installing your custom handlebars, preparation is key. Taking the time to set up properly ensures a smoother process and helps you avoid unnecessary mistakes. Let’s walk through the steps to get everything ready.
Safety Measures Before You Install Custom Handlebars
Safety should always come first when working on your motorcycle. A few simple precautions can protect you and your bike during the installation.
Disconnect the battery: Start by disconnecting the battery. This step prevents electrical hazards while you’re handling wires or controls. Always remove the negative terminal first to avoid accidental sparks.
Stabilize your motorcycle: Place your Harley on a stable stand or lift. This keeps the bike steady and prevents it from tipping over while you work. Double-check that the stand is secure before proceeding.
Pro Tip: If you don’t have a motorcycle lift, use a sturdy kickstand and ensure the ground is level. Stability is crucial for both safety and precision.
Initial Setup for Installing Handlebars
Once you’ve taken care of safety, it’s time to prepare your workspace and inspect your new handlebars. A little organization goes a long way in making the process hassle-free.
Inspect the new handlebars: Check that your custom handlebars are compatible with your Harley Davidson Sportster. Look for any signs of damage or defects. Confirm that the size and style match your riding preferences and that they fit your bike’s specifications.
Gather tools and materials: Lay out all the tools and materials you’ll need. Make sure your workspace is well-lit and free of clutter. Having everything within reach saves time and keeps you focused on the task.
Pro Tip: Keep a checklist of tools and materials nearby. Cross off each item as you gather it to ensure you don’t miss anything.
By following these preparation steps, you’ll set yourself up for a successful installation. A little effort now will save you time and frustration later.
Removing Old Handlebars
When it’s time to swap out your old handlebars, taking the right steps ensures a smooth and hassle-free process. Removing the existing handlebars from your Harley-Davidson Sportster might seem tricky, but with a clear plan, you’ll have them off in no time. Let’s break it down step by step.
Disassembling Components on Your Sportster
Before you can remove the handlebars, you need to take off the components attached to them. This part requires patience and attention to detail.
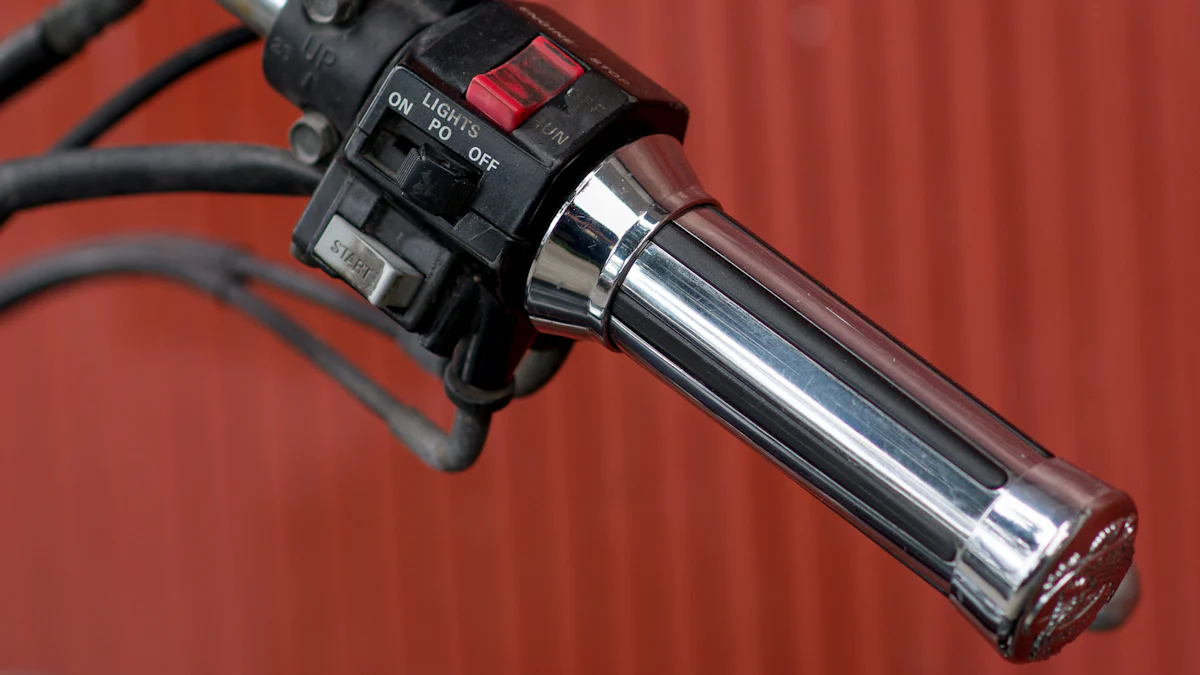
Remove the grips, bar ends, and control switches.
Start by removing the grips from the handlebars. If they’re rubber grips, you can use a flathead screwdriver to gently pry them loose. A little lubricant, like soapy water or rubbing alcohol, can help slide them off without tearing. For bar ends, unscrew them using the appropriate tool, usually an Allen key or screwdriver. Once the grips and bar ends are off, move on to the control switches. Use a Phillips screwdriver to loosen the screws holding the switch housings in place. Carefully separate the housings and disconnect any wires inside.
Pro Tip: Take photos of the wiring connections before disconnecting them. This makes reassembly much easier later.
Detach the brake and clutch levers.
Next, focus on the brake and clutch levers. Loosen the bolts securing the levers to the handlebars. Once loose, slide the levers off gently to avoid damaging the cables. If your bike has hydraulic brakes, be cautious not to spill any brake fluid during this step. Keep the levers and their bolts in a safe spot for reinstallation.
Quick Tip: Label each component as you remove it. This helps you keep track of everything and prevents confusion when putting it all back together.
Disconnecting the Old Handlebars
With the components removed, you’re ready to tackle the handlebars themselves. This step requires precision to avoid scratching or damaging your bike.
Loosen the handlebar clamps.
Locate the handlebar clamps at the base of the handlebars. Use the correct size wrench or socket to loosen the bolts on the clamps. Loosen them evenly, alternating between bolts to release the pressure gradually. This prevents the handlebars from shifting suddenly and keeps the process controlled.
Carefully remove the old handlebars.
Once the clamps are loose, lift the handlebars out of the mounts. Be gentle to avoid scratching the tank or other parts of your bike. If the handlebars feel stuck, wiggle them slightly while pulling upward. Set the old handlebars aside in a safe place. You’ve now cleared the way for your new custom handlebars.
Pro Tip: Inspect the handlebar mounts and clamps for wear or damage before installing the new handlebars. Replace any worn parts to ensure a secure fit.
By following these steps, you’ll successfully remove the handlebars from your Sportster. Taking your time and staying organized makes the process straightforward and stress-free.
Installing New Handlebars
Once you’ve removed the old handlebars, it’s time to bring your custom setup to life. Installing new handlebars on your Harley-Davidson motorcycle is a rewarding process that enhances both style and functionality. Follow these steps to ensure a smooth installation.
Attaching the New Handlebars to Your Harley Davidson
Position the new handlebars in the clamps.
Start by carefully placing the new handlebars into the mounting clamps. Align them with the center marks on the clamps to ensure proper positioning. This step is crucial for maintaining balance and control while riding. If you’re using premium options like Klock Werks handlebars or Wings Custom Handlebars, you’ll notice their precise design makes alignment easier. These handlebars are crafted for durability and performance, giving your bike a polished look.
Pro Tip: Double-check the alignment by sitting on your bike and holding the handlebars. Make sure they feel comfortable and natural in your hands.
Tighten the clamps to secure the handlebars.
Once the handlebars are in place, use a torque wrench to tighten the clamp bolts evenly. Alternate between bolts to apply equal pressure on both sides. Over-tightening can damage the clamps, so follow the manufacturer’s torque specifications. If you’re installing larger handlebars like ape hangers or drag bars, ensure they’re securely fastened to handle the added leverage.
Quick Tip: Apply a small amount of anti-seize compound to the bolts before tightening. This prevents rust and makes future adjustments easier.
Reconnecting Components After Installing Motorcycle Handlebars
Reattach the brake and clutch levers.
With the handlebars secured, reattach the brake and clutch levers. Slide each lever into its designated position and tighten the bolts to hold them in place. Ensure the levers move freely without resistance. If your bike has hydraulic brakes, check for any leaks during this step. Properly installed levers are essential for safe and smooth operation.
Reinstall the grips and control switches.
Next, slide the grips back onto the handlebars. Use a bit of lubricant, like soapy water, to make this easier. Secure the grips with screws or adhesive, depending on the type. Then, reattach the control switches. Refer to the photos you took earlier to reconnect the wires correctly. Tighten the switch housings and test the buttons to confirm they work as expected.
Pro Tip: If you’re upgrading to thicker handlebars like the Rhino Handlebars from Wings Custom, ensure your grips and switches are compatible with the new diameter.
Managing Cables and Wires for Custom Handlebars
Route cables and wires properly to avoid tangling.
Proper cable management is key to a clean and functional setup. Route the throttle, clutch, and brake cables along the handlebars, ensuring they don’t interfere with movement. Use electrical tape or zip ties to secure the cables neatly. Avoid sharp bends or tight loops that could restrict cable movement.
Use cable extensions if necessary.
If your new handlebars are taller or wider than the stock ones, you may need cable extensions. Measure the existing cables to determine if they’re long enough. For taller setups like ape hangers, extensions are often required for the throttle, clutch, and brake lines. Install the extensions carefully, following the manufacturer’s instructions.
Quick Tip: Many custom handlebars, such as those from Klock Werks, are designed to work seamlessly with standard cable lengths. Check the product details before purchasing to save time and effort.
By following these steps, you’ll successfully install custom handlebars on your Harley-Davidson motorcycle. Take your time to ensure everything is secure and aligned. Once complete, your bike will not only look amazing but also provide a more personalized riding experience.
Adjustments and Testing
Once your new handlebars are installed, it’s time to fine-tune their position and ensure everything works as it should. Proper adjustments and thorough testing will make your ride more comfortable and safe. Let’s dive into the steps.
Aligning the Handlebars on Your Harley Davidson Sportster
Adjust the handlebars to a comfortable position.
Sit on your Harley-Davidson and grip the handlebars. Pay attention to how they feel in your hands. Adjust them to a position that feels natural and comfortable. Your arms should have a slight bend at the elbows, and your wrists should align with the grips. Avoid extreme angles that could strain your shoulders or wrists during long rides.
Pro Tip: Take your riding posture into account. If you prefer a relaxed cruising position, lower the handlebars slightly. For a more aggressive stance, raise them to match your style.
Ensure they are centered and symmetrical.
Step back and visually inspect the handlebars. Check if they are centered and symmetrical with the front wheel. Misaligned handlebars can affect your control and balance. Use a measuring tape or ruler to confirm equal spacing on both sides. If needed, loosen the clamps slightly and make small adjustments until everything lines up perfectly.
Quick Tip: A centered handlebar setup not only improves handling but also enhances the overall look of your bike.
Testing the Functionality of Your New Handlebars
Check the throttle, brake, and clutch for smooth operation.
Test the throttle by twisting it gently. It should move smoothly without sticking or feeling too tight. Pull the brake and clutch levers to ensure they engage and release properly. If you notice any resistance or unusual stiffness, inspect the cables for proper routing or tension. Adjust or lubricate them as needed.
Pro Tip: If you installed taller handlebars, double-check that the cables aren’t stretched too tight. Cable extensions might be necessary for optimal performance.
Test the electrical components, such as turn signals and lights.
Turn on your motorcycle and test all electrical components. Activate the turn signals, headlights, and brake lights to confirm they work correctly. Press the horn and check the indicator lights on your dashboard. If any component fails to function, revisit the wiring connections and ensure everything is secure.
Quick Tip: Keep a multimeter handy to troubleshoot electrical issues. It’s a valuable tool for checking voltage and continuity in your bike’s wiring.
By aligning your handlebars and testing their functionality, you’ll ensure a safer and more enjoyable ride. These final steps complete the installation process and let you hit the road with confidence. Your Harley-Davidson Sportster is now ready to showcase its new look and improved performance.
Common Mistakes and Maintenance Tips
Installing custom handlebars on your Harley-Davidson can be a rewarding project, but it’s easy to make mistakes if you’re not careful. Once the installation is complete, regular maintenance ensures your bike stays in top condition. Let’s explore common pitfalls to avoid and tips to keep your handlebars in great shape.
Avoiding Mistakes When You Install Custom Handlebars
Over-tightening clamps or bolts.
One of the most frequent mistakes is over-tightening the clamps or bolts. While it might seem like tightening them as much as possible ensures security, it can actually damage the clamps or even the handlebars themselves. Use a torque wrench to tighten bolts to the manufacturer’s specifications. This tool helps you apply the correct amount of pressure, keeping everything secure without risking damage.
Pro Tip: If you’re unsure about the torque settings, refer to your Harley-Davidson manual or consult a professional mechanic.
Neglecting to test all controls before riding.
After installation, skipping the testing phase is another common error. Failing to check the throttle, brake, clutch, and electrical components can lead to serious issues on the road. Always test each control thoroughly before taking your bike out for a ride. Ensure the throttle moves smoothly, the brakes engage properly, and the clutch operates without resistance. Don’t forget to verify that turn signals, headlights, and other electrical features are functioning correctly.
Quick Tip: Perform a short test ride in a safe area to confirm everything works as expected before hitting the highway.
Maintenance Tips for Your Harley Davidson Handlebars
Periodically check the handlebars for tightness.
Over time, vibrations from riding can loosen the bolts securing your handlebars. Make it a habit to inspect them regularly. Use a wrench to ensure the bolts are still tight and secure. Loose handlebars can affect your control and compromise safety, so don’t overlook this simple yet crucial step.
Pro Tip: Add this check to your routine maintenance schedule, such as when you inspect your tires or oil levels.
Inspect cables and wires for wear and tear.
Cables and wires routed along your handlebars endure constant movement and tension. Check them frequently for signs of wear, such as fraying, cracking, or pinching. Damaged cables can lead to malfunctions, like a sticky throttle or unresponsive brakes. Replace any worn cables immediately to maintain smooth operation.
Quick Tip: Lubricate the cables during your inspections to reduce friction and extend their lifespan. Use a high-quality lubricant designed for motorcycle cables.
Maintenance Reminder: While you’re inspecting your handlebars, take a moment to check other parts of your Harley-Davidson. For example:
Examine the chain and sprockets every 450 to 950 km.
Check tire pressure and tread depth regularly for safe road use.
Inspect the battery for swelling, leaks, or corrosion.
By avoiding common mistakes and staying on top of maintenance, you’ll keep your handlebars—and your entire bike—in excellent condition. A little effort goes a long way in ensuring a safe and enjoyable ride every time you hit the road.
Installing custom handlebars on your Harley-Davidson is a satisfying way to personalize your ride. By following the steps outlined in this guide, you’ve learned how to remove old handlebars, install new ones, and ensure everything functions perfectly. Take your time during the process and enjoy the hands-on experience—it’s part of what makes motorcycle customization so rewarding. Once you’ve mastered this upgrade, consider exploring other ways to enhance your bike, like upgrading the exhaust or adding unique accessories. Your Harley is a canvas, and every change reflects your style.
FAQ
What are the unique features of Klock Werks handlebars for Harley-Davidson motorcycle models?
Klock Werks handlebars stand out because they’re designed to fit directly onto many Harley-Davidson models. This eliminates the hassle of making major modifications to your bike. Each handlebar set also comes with step-by-step instructions, making the installation process straightforward even for beginners. If you’re looking for a blend of style, durability, and ease of use, these handlebars are a great choice.
Do I need cable extensions for all custom handlebars?
Not always. Whether you need cable extensions depends on the size and style of the handlebars you choose. Taller handlebars, like ape hangers, often require longer cables for the throttle, clutch, and brakes. However, some handlebars, such as those from Klock Werks, are designed to work with standard cable lengths. Always measure your existing cables and compare them to the requirements of your new handlebars before starting the installation.
How long does it take to install custom handlebars?
The installation process typically takes about 30 to 60 minutes if you have the right tools and follow the steps carefully. However, the time may vary depending on your experience level and the complexity of the handlebars you’re installing. Taking your time ensures a safer and more precise installation, so don’t rush the process.
Can I install custom handlebars without professional help?
Yes, you can! Installing custom handlebars is a DIY-friendly project if you have basic mechanical skills and the right tools. The step-by-step guide provided in this blog simplifies the process. However, if you’re unsure about any step or lack the necessary tools, consulting a professional mechanic is always a good idea.
What should I do if my handlebars feel misaligned after installation?
If your handlebars feel off-center or uncomfortable, loosen the clamps slightly and adjust their position. Sit on your bike and hold the handlebars to find the most natural and comfortable alignment. Once you’re satisfied, tighten the clamps evenly to secure the handlebars. Always double-check the alignment visually and through a short test ride.
Are there specific handlebars recommended for long-distance rides?
Yes, certain handlebars are better suited for long-distance comfort. For example, beach bars or touring handlebars provide a relaxed grip and reduce strain on your shoulders and wrists. When choosing handlebars for long rides, prioritize ergonomics and comfort over aesthetics. Test different styles to find what works best for your riding posture.
How do I maintain my custom handlebars after installation?
Regular maintenance keeps your handlebars in top condition. Periodically check the bolts for tightness, as vibrations from riding can loosen them over time. Inspect the cables and wires for wear or damage, and replace them if needed. Cleaning the handlebars with a soft cloth and mild cleaner also helps maintain their appearance.
What’s the best way to manage cables and wires during installation?
Proper cable management is crucial for a clean and functional setup. Route the cables along the handlebars, ensuring they don’t interfere with movement. Use electrical tape or zip ties to secure them neatly. Avoid sharp bends or tight loops that could restrict cable movement. If your handlebars require cable extensions, follow the manufacturer’s instructions for installation.
Can I reuse my old grips and control switches with new handlebars?
Yes, in most cases, you can reuse your old grips and control switches. However, ensure they’re compatible with the diameter of your new handlebars. If you’re upgrading to thicker handlebars, you may need to purchase new grips and switches that fit properly. Always inspect your old components for wear or damage before reusing them.
What are the most common mistakes to avoid when installing custom handlebars?
Some common mistakes include over-tightening the clamps, skipping the testing phase, and neglecting proper cable management. Over-tightening can damage the clamps or handlebars, while skipping tests can lead to unsafe riding conditions. Always follow the manufacturer’s torque specifications and test all controls thoroughly before hitting the road. Proper preparation and attention to detail make all the difference.
Cần link 188bet mới nhất hả? Link188betmoinhat là chuẩn bài rồi! Chơi mượt mà, không lo bị chặn. Anh em vào chiến thôi! Check out link188betmoinhat